How to Properly Use Biohazard Bags
Clinical laboratories, healthcare facilities, and pharmacy industries use biohazard bags to organize, pack, and dispose of hazardous and infectious waste. These biohazardous materials are sorted and placed into diverse types of bags, such as autoclave bags, along with red and yellow biohazard bags. Waste service providers will typically label the bags with the words “biohazardous waste” or with a biohazard symbol and “biohazard.” They must be disposable and preventive of moisture while having the strength to avoid tearing, ripping, or bursting under standard usage.
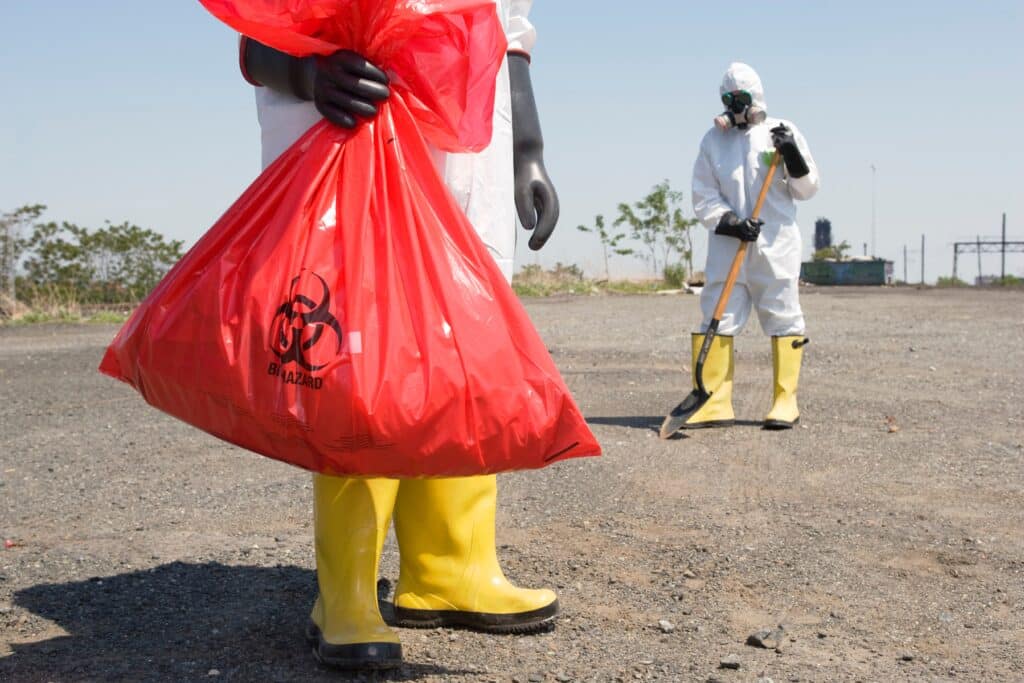
How to Use Red and Yellow Bags
Red Biohazard Bags: These bags collect anatomical waste, including human bodily fluids such as tissues, saliva, semen, organs, and body parts. Pathological and microbiological waste containing blood and other bodily fluids belong in these bags. Red biohazard bags store regulated medical waste regulated by the Department of Public Health (DPH). Clinical waste such as chemicals, alcohols, solvents, radioactive waste, pharmaceutical waste, lead, apparatus, tubing, food wrappers, and beverage containers should not be in red biohazard bags.
Yellow Biohazard Bags: These bags are more used for clinical waste such as chemicals, infectious clinical materials, and pharmaceutical medicines, specifically including dressings, swabs, tissues, aprons, soiled gloves, nappies, and pads. Yellow bags can also include IV lines and fluid bags used for pharmaceutical medicine, syringe bodies, and disposable metallic items. These bags should not contain pathological, anatomical, domestic, non-infectious, or placental waste.
Follow these tips for proper handling of red and yellow bags:
- Place the biohazard symbol onto the bags.
- Ensure proper sealing of the bags.
- Always wear gloves, an apron, a face mask, or eye protection when handling, changing, or moving the bags.
- Use it to line your medical waste container.
- Do not dispose of these bags in regular municipal or city waste bins. Licensed medical waste contractors are responsible for collecting such waste.
Healthcare providers and facilities generate medical and biohazardous waste daily. Due to numerous factors, facilities cannot dispose of this waste with regular garbage. Instead, waste disposal service workers place it into dedicated containers or bags specifically designed for medical/biohazardous waste. Unlike standard trash bags, these biohazard bags have a design that can contain potentially hazardous materials safely.
Step-by-Step: How to Properly Use a Biohazard Bag
Step 1 – Select the correct bag color
Use the color-coding guide above to select the right bag before you start. Using the wrong bag type is a compliance violation, not just a procedural error.
Step 2 – Line your waste container before use
Place the biohazard bag inside the dedicated waste container before any waste is added. The bag should fit the container without bunching at the bottom – an ill-fitting bag increases the risk of tears and spills.
Step 3 – Put on personal protective equipment
Before handling any biohazard bag – whether adding waste, sealing, or moving it – put on gloves and an apron at minimum. If there is any splash risk, add a face mask and eye protection.
Step 4 – Add waste carefully
Place waste into the bag without forcing or compressing it. Never reach into a biohazard bag with unprotected hands. Do not mix waste types – sharps must never go into a biohazard bag, only into a rigid sharps container.
Step 5 – Stop at the 3/4 full mark
Never fill a biohazard bag more than three-quarters full. Overfilled bags are harder to seal, more likely to tear during transport, and are a compliance violation. When the bag reaches the 3/4 mark, seal it and replace it with a new one.
Step 6 – Seal the bag properly
Seal the bag using the gooseneck method: gather the top of the bag, twist it closed, then fold it over and secure it with a cable tie or tape. Never staple a biohazard bag – staples create puncture points that can cause leaks.
Step 7 – Label the sealed bag
Every sealed biohazard bag must be labeled before it leaves the point of generation. The label must include:
- The biohazard symbol
- Waste type description
- Generating facility name and address
- Date of sealing
Step 8 – Move to your designated storage area
Transport sealed bags using a wheeled trolley or cart – do not drag them across the floor. Store in your designated biohazard waste storage area until scheduled pickup. Do not store sealed bags in hallways, patient areas, or near food preparation areas.
Biohazard Bag Compliance Requirements
Not all biohazard bags are created equal. Using non-compliant bags is one of the most common and costly compliance mistakes in healthcare facilities. Here is what to look for:
DOT compliance marking: Bags used for transported biohazard waste must meet DOT performance standards and carry the UN 3291 marking. This is required for any waste that leaves your facility.
Minimum thickness: Red biohazard bags must be a minimum of 1.5 mil thick for single-use applications. High-risk or heavy waste may require 2 mil or thicker.
Leak resistance: Bags must be tested for leak resistance – look for bags that meet ASTM D1709 impact resistance standards.
Biohazard symbol: The internationally recognized biohazard symbol must be printed directly on the bag in a contrasting color – not on a separate label that can fall off.
Size matching: Always match bag size to container size. A bag that is too small will not line the container properly; a bag that is too large creates excess material that can get caught in the seal.
Are you looking for a provider to carry all the weight of your medical waste disposal? Request your free quote today, and we will prepare to take care of the rest!